This story was provided by our newest contributor for The Local Moms Network, Maria Provenzano, Lifestyle + DIY Expert of Hallmark’s Home and Family, founder of From Scratch and lover of all things creative! Says Maria: “When I’m not crafting, you can find me in Los Angeles with my husband and two beautiful (and crazy) boys, with my gal pals, doing yoga or drinking coffee. Fair warning — 99.9% of the time I am covered in flour, paint, or glitter!”
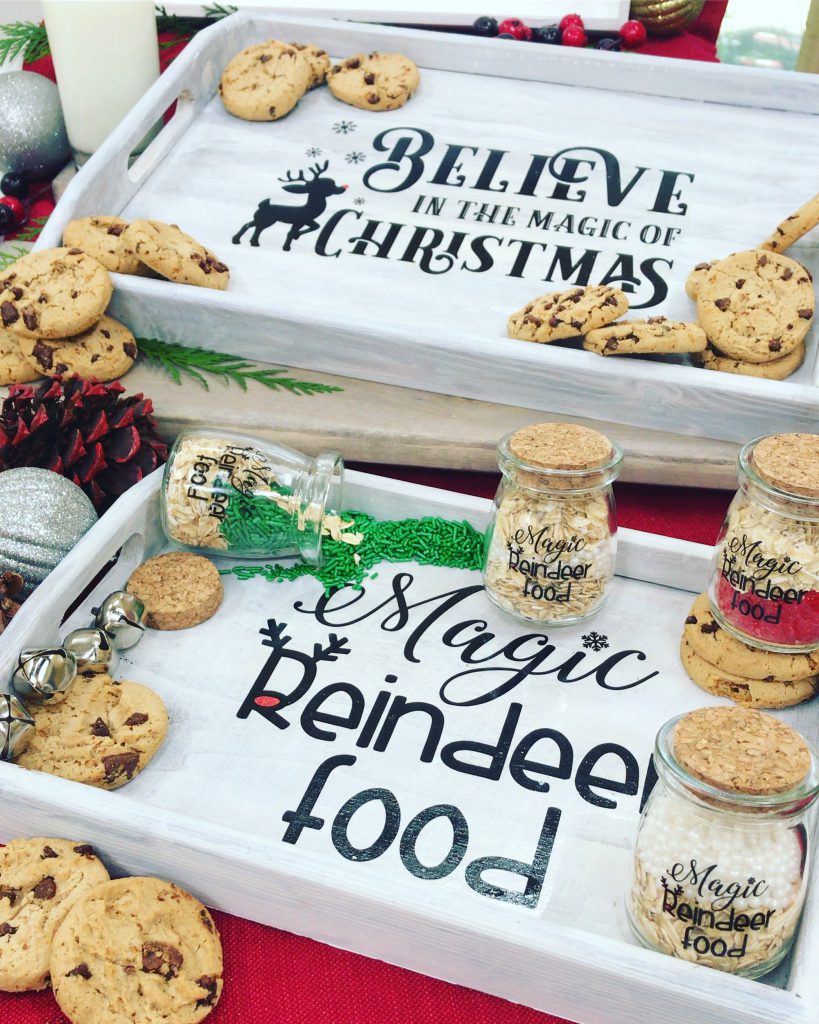
It’s the most wonderful time of the year… It’s officially the holiday cookie season! The Christmas season basically starts and ends with cookies in my house. To celebrate and elevate your next batch of treats, I’m showing you how to create an adorable DIY Christmas cookie tray for your Cookies for Santa OR next holiday gathering!
These trays are beyond cute, and they are much easier to create then you would expect! They are the perfect homemade gift to give to neighbors, teachers, and other family members.
I wanted to create a ‘Twas The Night Before Christmas themed tray since it’s a holiday classic and I came across this waterslide decal paper which made everything fall into place! If you have a Cricut, then you may not need to use this paper, but for those who do not own a Cricut, then this decal paper is the way to go.
Follow the instructions below to have fun with your assorted cookie presentation!
Materials for Tray
- 1 16×12 wood tray
- White paint and paint brush
- Clear acrylic spray
- Holiday images
- Laser printer
- Waterslide paper
- Bowl of water
Ingredients for Reindeer Food
- Jars
- Oats
- Sprinkles
- Edible glitter (optional)
Directions
- Paint wood tray white, let dry completely (suggested 3 hours).
- Print your design on the Laser waterslide decal paper, with your Laser printer.
- Cut the images as close to the borders/writing as you can. Cut the decal paper into several smaller pieces so it is easier to apply them.
- Apply three coats of the clear acrylic sealer onto the design, letting it dry completely after each coat.
- Put the first decal paper into the water and wait for a few seconds.
- Once dry, place the design into a bowl of water for about 30-60 seconds, or until the decal starts to peel away from the backing.
- Remove from water and carefully place the design onto the tray; once it is placed, it cannot be removed.
- Use a soft cloth to remove any excess water and remove air bubbles to make it smooth Allow to dry for a few hours to make sure it completely sets.
- Repeat the process by labeling the jars for the reindeer food if desired; you could also make a gift tag if you like instead.
- Make a funnel with a piece of paper, and add the “reindeer food,” aka oats and sprinkles, into the jars
- Once everything is dry and set, you can place your plate of cookies and glass of milk for Santa on the tray, along with the reindeer food.
**Images available for purchase at silhouettedesignstore.com.
Now that your tray is dry and set it’s time to place your assortment of cookies and milk for Santa on the tray. Luckily baking cookies is my recreational activity of choice and I have three of my favorite recipes I’d love to share with you this season!
Starting off with a classic – this tasty recipe is not only my favorite but it’s also packed with spice and flavor! Mixing the best of both worlds, both soft and chewy and sure to be an instant crowd pleaser!
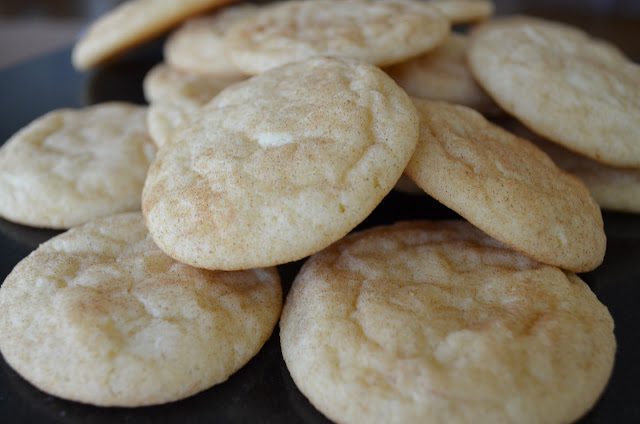
Whether you want to whip up a batch for your cookie exchange or bake a tray for the in-laws, you simply can’t beat this snickerdoodle recipe. Click here for recipe details!

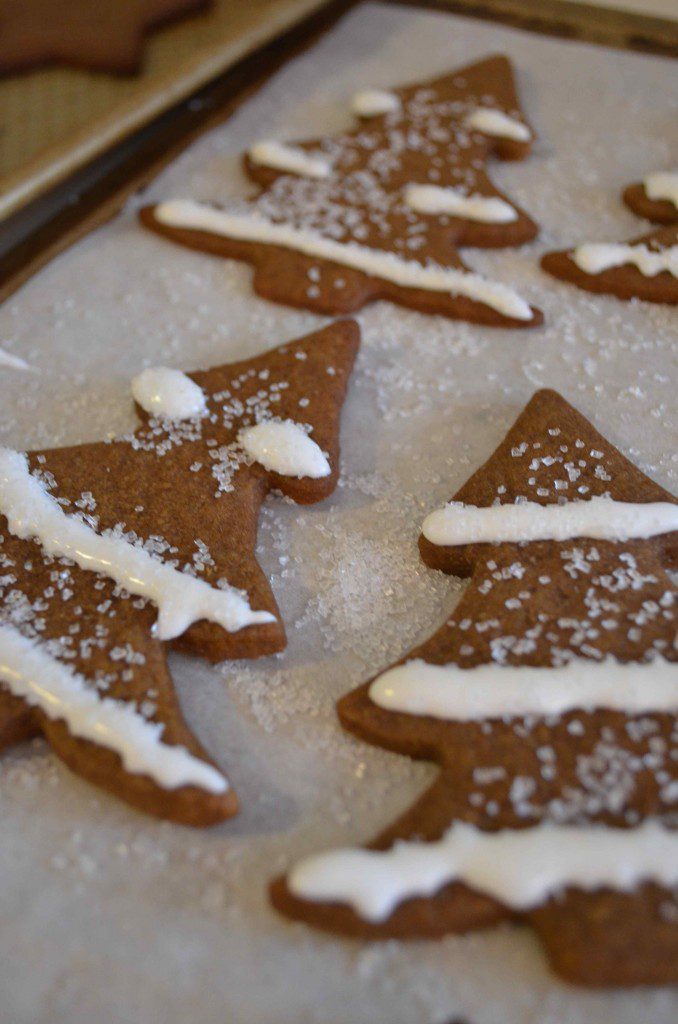
Pretty much the most festive cookie on my list this year. Enjoy this rich and crumbly snowball cookie recipe while you curl up by the fireside. The perfect pairing to top off your holiday treat tray.

Once you’ve assembled your holiday cookie tray wrap the entire thing in plastic wrap and keep at room temperature for a few hours before serving. Lastly, head to your holiday potluck and enjoy being the hit of the holiday soirée!
